How to extract images from video files
A step by step guide for how to extract images from digital video files in windows.
Getting ready
If you are presenting videos on web pages for people to download it might be a good idea to give an overview of the video by displaying screenshots from the video. This way
your site visitors do not have to download video they are really not interested in saving time for you and the web site visitor. This guide will use
the Windows Vista example videos since they are included with Windows Vista and most people should already have them on their computer. You can follow
this tutorial using your own videos but then you might need to download and install new video codecs.
If you do not have Fast Video Indexer installed you will need to download it from www.FastVideoIndexer.com. Install the program and start it up.
Select videos to grab frames from
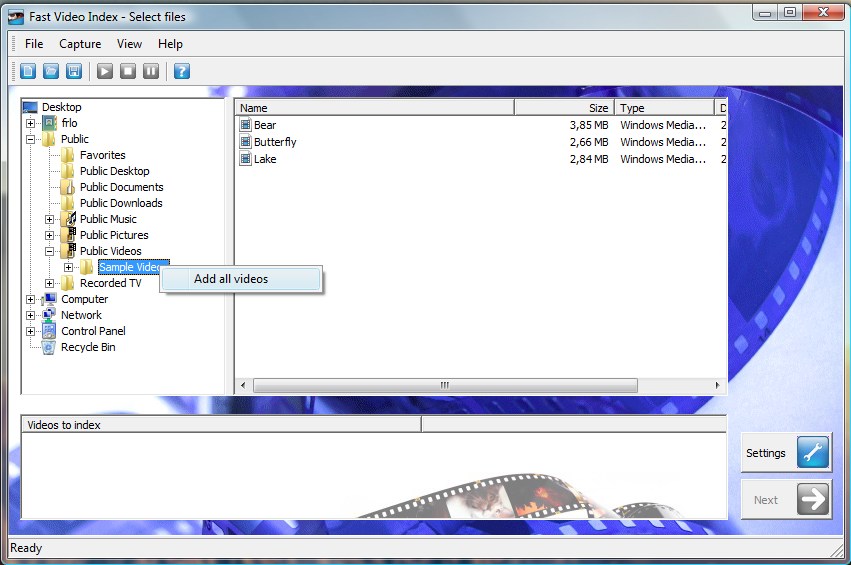
Now it is time to select the videos we want to extract scenes from. In the folder view to the right expand "desktop/public/public videos" and find "sample videos".
Right click "sample videos" and select "Add all videos" from the context menu.
All videos in the folder will be listed at the bottom of the Fast Video Indexer program.
If you have your videos stored in another location simply add the videos from that folder instead.
Change settings
Next we want to select our settings. We do not want the program to generate web pages or collection images, we just want it to extract frames from the videos.
Click the "settings" button to open up the settings page. The first two text fields specifies when frames will be extracted. By default the first video frame
will be extracted one minute in to the video and then another frame will be extracted every three minute.
If you are working with videos that are shorter than 60 seconds one frame will still be extracted but from the middle of the video.
Next have a look at the checkboxes and make sure all checkboxes are unchecked except "Enable image extraction to" which
should be checked. By default the program will save all extracted images in the same folder as the video, this might
become a bit unorganized so select a working folder for where to store your extracted images by changing the radio
button to "here" and enter your working folder.
The settings button will open up a list of more advanced settings that normal users probably do not want to change, we leave all of them as they were.
Extracting frames
We are now ready to start extracting frames from the videos. Click "Close" to close down the settings page and then "Next" to start extracting video frames.
Each video in the list will be processed and pictures of the video scenes will be saved in the folder you specified. Click "Next" to view the result.
Finished
When images have been extracted from the videos you can view the result listed. Double click an image to open the extracted image in your image viewer.
If you save the project you can go back to the result page for all your extracted videos to quickly view the generated images.
Conclusion
Extracting video frames using Fast video indexer is very simple and fast. If you want to present videos clips on the internet it is good idea to
present images from the video as a preview to help site visitors decide if they want to watch or download the complete video.
Resources
Fast video indexer homepage
Fast video indexer FAQ
Download video Codecs